Study Blueprint
Create a new Study Blueprint in the Assets area
- Press the large “+” sign under Study Blueprints
- Give it a good name like “Tutorial 1 Study”. Make sure “Open Editor” is checked. Click on “Create”.
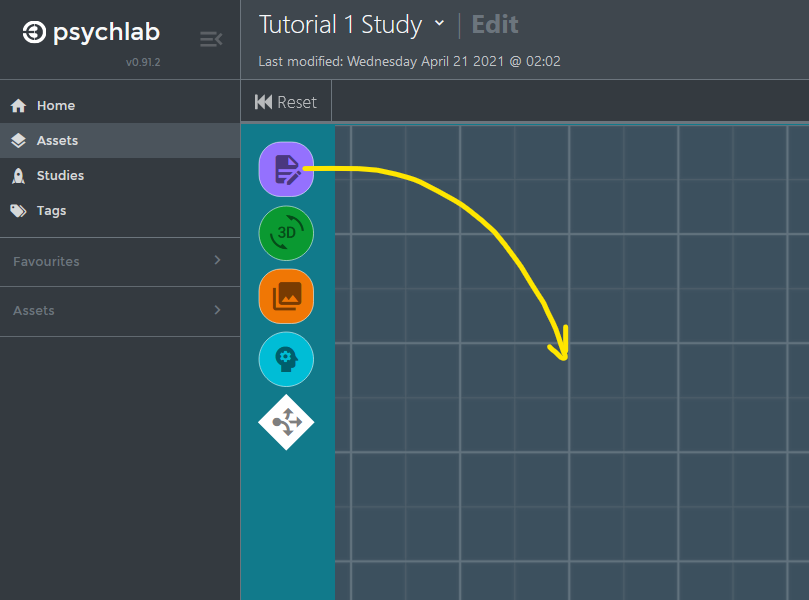
- Drag a “Form” node onto the blueprint.
NOTE
You can zoom in/out with your mouse wheel, and pan by pressing and holding the middle mous button.
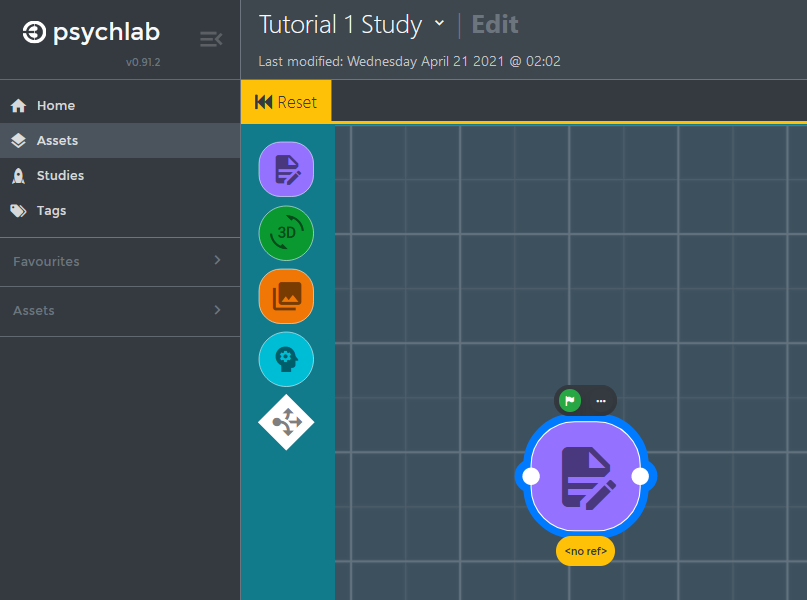
- Click on the new form node, and from the right side form properties that appear, select the “Click to find...” box and in the form browser find the “[Tut] Introduction” form you created in Step 1. Click on “Confirm and Close” after you have selected the correct form.
NOTE
All saved versions of assets are stored and you can bring any version of any study element into your blueprint.
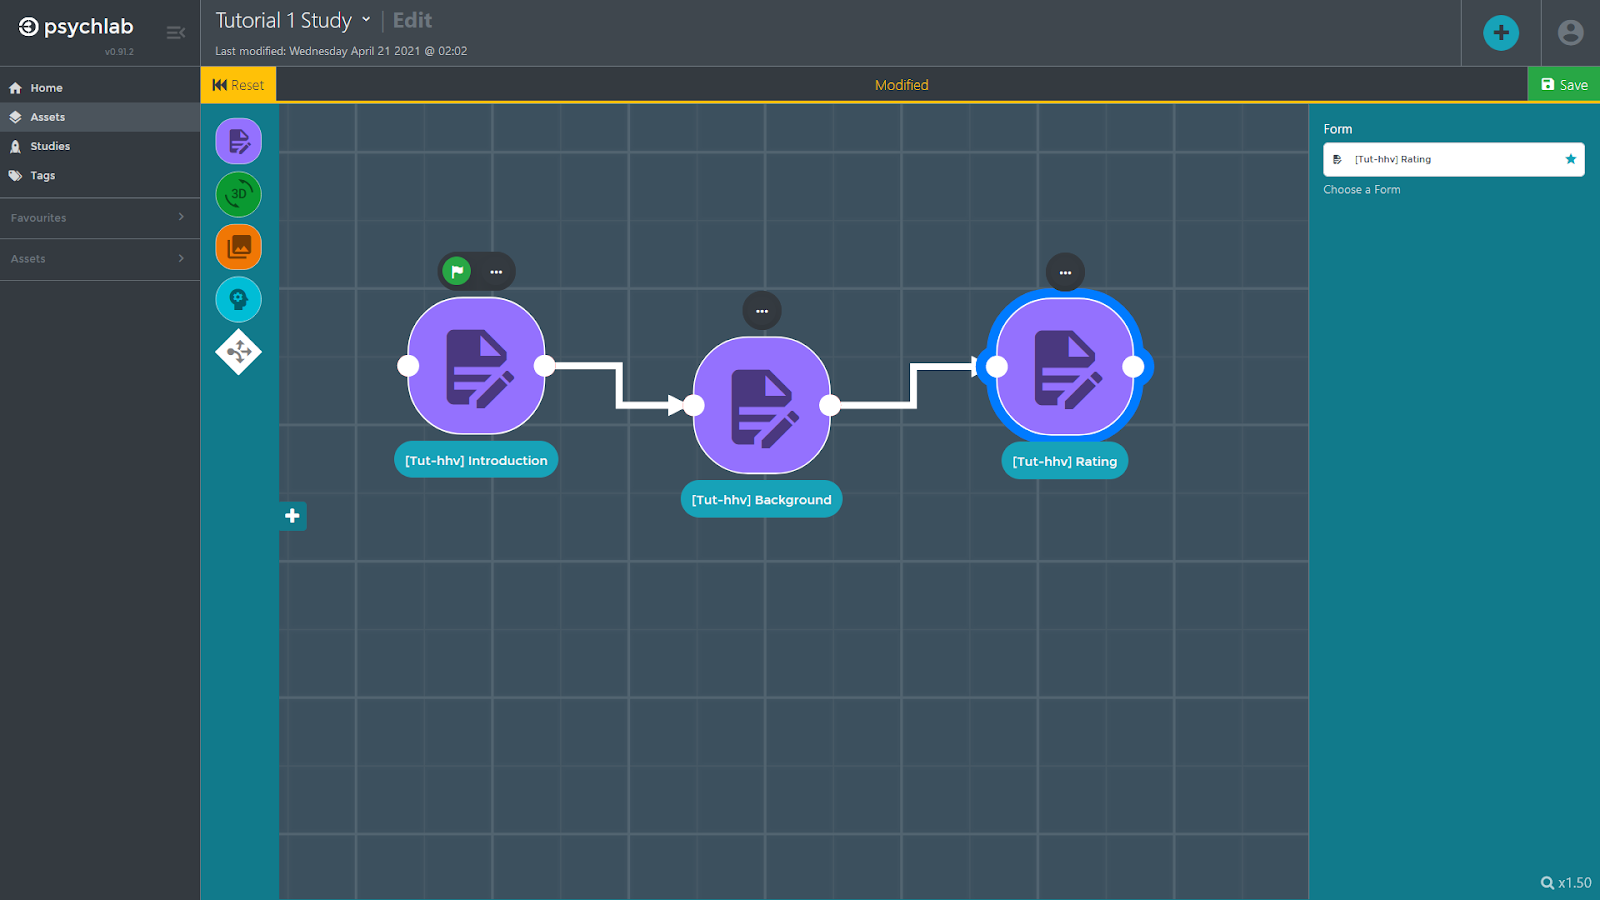
- Repeat the these last couple of steps to create two more nodes, and assign your “[Tut] Background” and “[Tut] Rating” forms to them.
- Finally connect the three nodes together so the study will first display the “Introduction”, then the “Background” questions and finally the “Rating” question. You connect them by clicking and dragging from a white connector spot on a node and releasing onto the connector spot on another node.
- Click on the green “Save” icon in the upper right.
- Close the blueprint edit screen and return to the Assets area by clicking on the back arrow at the top of the screen (next to the name of your study).